When putting stickers on our last bought Playmobil set i was wondering what it is like when one has bought Playmobil for the first time and is confronted with stickers. Some sets have several of them and it may look like an impossible task to put them on if you’re not familiar with them. So i got the idea of writing a tutorial about stickers. Members of this forum are perhaps already skilled in putting stickers on, but for others who have bought their first Playmobil set with stickers it may be very useful to read about this subject.
I think Playmobil stickers are great! They can enhance a set and it gives you the choice to use them or not, for example stickers for furniture can be put on or left out. The furniture without stickers can then still be used in custom building.
The quality of the stickers is also great, good print, printing is positioned right and almost never off, and the sticker paper is of good strong quality.
Is it difficult to put them on? Yes and no, depending on the shape of them, where they are put, and depending on your skills.
Before starting.
This may sound obvious but make sure your hands are clean. Greasy hands can make the paste of the stickers go bad. Also be relaxed. Don’t do this in a hurry but do it calmly for the best results. At first you may be a bit nervous about pasting the stickers but once you gain experience you also gain confidence and that helps in becoming more relaxed. And keep in mind that with new sets there is often a spare sticker sheet available at direct parts on the Playmobil website, so if you fail and ruin a sticker you can order a new sticker sheet and try again. Just check first if a spare one is available, it isn’t always! With older sets you may be lucky to find spare sheats but often they are not available anymore.
Pasting the stickers.
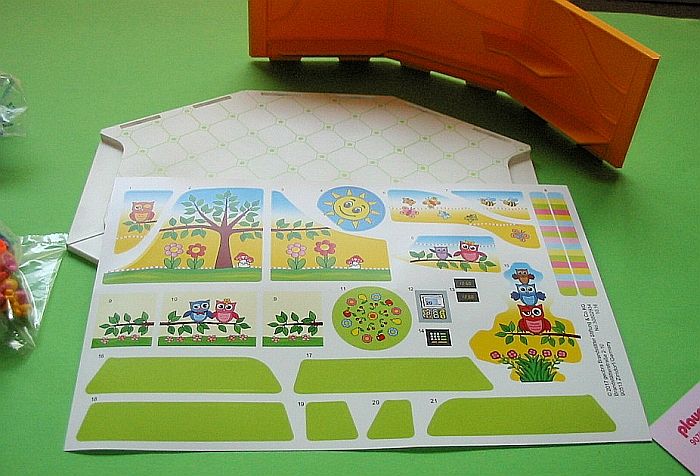
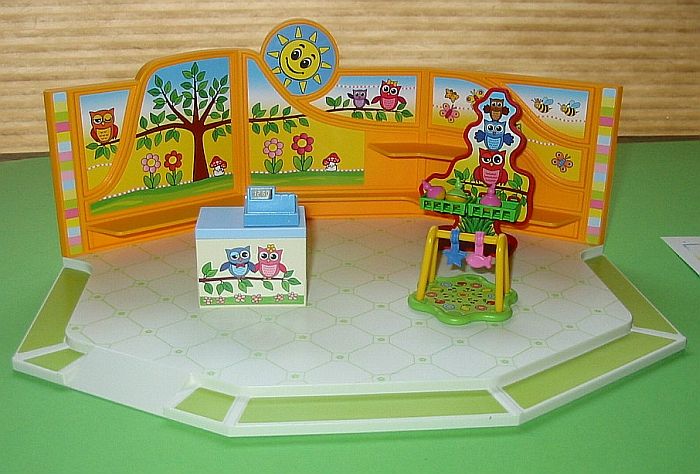
Playmobil stickers are always numbered, unless there is only one sticker. In the building instructions you can find where to put which sticker according to their number. In a lot of cases the sticker will fit in a “shape”, like on the background wall of this baby shop on the photo.


In such cases it is not too difficult to put the sticker in the right place. When you are a collector and want it perfect then keep in mind that most stickers are a tiny bit smaller then the shape they fit in, it is rare that a sticker is exactly the same size as the shape. This means you need to “centre” the sticker for as you start putting the sticker on right at the side of the shape, you will see that at the other end you have some space left. What i often do is holding the sticker above the shape to see how it fits. Beware that most stickers are static and will attach themselves to the plastic! Then i know how much space i leave to centre the sticker. A lot of stickers are long and can have distinctive shapes, like the butterfly sticker on the photo. But it does have some straight lines on either side. I always use straight lines to start with for alighning such stickers. When you start pasting such a sticker do it carefully and keep looking whether it comes on right in the shape. If it goes wrong then simply pull it off gently and start again. These stickers are strong enough to be pulled off gently and the paste stays strong. This strong paste also means that when the sticker is completely on it is hard to peel it off again!
When there is no shape like on the desk here on the photo, then use your own judgement for putting it on at the right place.
Difficult ones!
First of all, the toothpaste and milkcartons. They often come with stickers, but because of the shape with sharp edges the stickers often peel themselves off a bit. This can be prevented with glue clamps or simple clothepegs. It may take days before the paste holds!
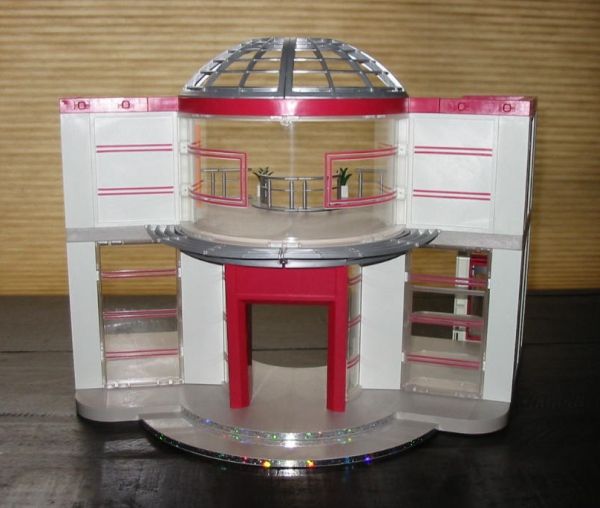
Then there are the long narrow stickers. Here is a photo of the shopping mall set:

Do you see these sparkly bits on the steps to the entrance? Those are stickers and the hardest i have ever done! Aligning them is very hard. Fortunatly there are markers in the centre of the steps which should be used to put the stickers on properly. Often these markers are little triangles. For me the only way to put these stickers on was starting from these markers, so from the middle of the sticker and not from one end. From the middle go to one end carefully, making sure the sticker is aligned with the step, then do the other end. Raven was holding the baseplate at an angle otherwise it would have been impossible! For such difficult places you may need four hands.
Then the mirrors. Mirror stickers are great as they make a mirror work as a mirror! I don’t know what material these stickers are made of, but it could be or looks like thin metal. And they behave like that! These stickers can bend and once there is a fold in them it is difficult to get the fold out again. So be carefull when the pasting doesn’t go well and you have to pull the mirror sticker off again. These stickers also have a protecting layer on and i always leave them on untill the sticker is on it’s place. This prevents fingerprints on the mirror and believe me it shows.
Round stickers are difficult to align too. Some chairs with a round seat have a sticker on with a design. There is no shape to paste the sticker in and the sticker is smaller then the seat. It is difficult to put the round sticker precisely in the middle of the round seat, if you’re off then it shows and it doesn’t look good. I have failed with such a sticker and i’m glad Playmobil doesn’t have many of those stickers.
I hope that this will be of help to others and maybe an encouragement to someone who is wondering if they can manage to paste the stickers of a certain set. Don’t let stickers be in the way of buying a Playmobil set. You can choose not to use the stickers if they don’t make much of a difference, or you can ask someone else to do the pasting. Having fun with Playmobil is the most important thing.
I hope i didn’t forget anything, but please add your tips and tricks to this tutorial.