Last week was half term here in England, so I had some time to help my nephew with a customisation project he'd had in mind for a while. He brought round some knights which he wanted to make into crusaders. This was the first time we'd tried applying decals and removing print, so I thought I'd share it here, in case anyone else is new to it too!
He had ordered 7 horses and caparisons from set 3699 from Playmobil parts, and was lucky enough to spot a box of crusader knight specials (4670) on Ebay.
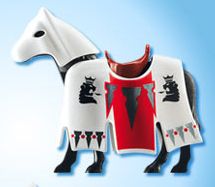
starter horse from 3699
No customising for the figures, but he wanted to change the horses to match. After our cleaning cupboard investigations he used Co-op cream cleaner to remove the red print and lion decorations from the sides of the caparisons (luckily for me, he did this at home before he brought them round - it took a while of patient rubbing, apparently!)
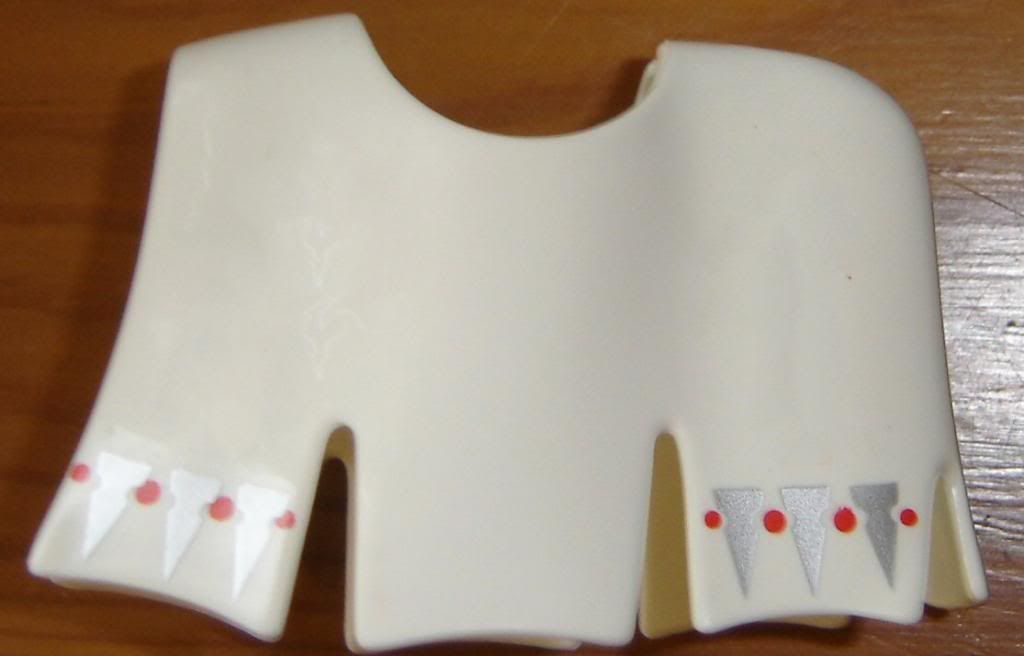
Cleaned.
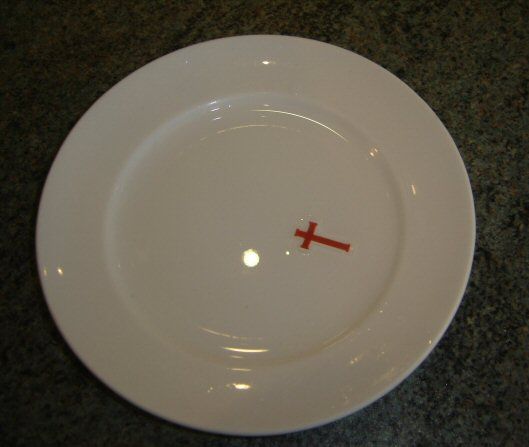
We used the cross from the crusader's shield, whipped out the background in Photoshop, and printed it out onto decal paper. The decal paper was bought a while ago for customising some Warhammer banners, but I think it was around £4ish a sheet. Luckily, all our crosses managed to fit onto just one

After a while of cutting (there seemed to be an endless amount of crosses for just 7 knights!) we were ready to soak and apply. We left a slight border around each cross (for ease of handling once it was being positioned) but this is transparent once applied (not white as it looks while it's still attached to the backing paper)

The decals then need to soak for a short while in water, until they start to separate from the backing paper.
A saucer of water (which doesn't really show up well on the photo! It IS there, honest!)
You do get a certain amount of 'slippage' when applying the designs, so it is a little more forgiving than stickers (I dread 'stickering' sets, in case I make a mess of them!). Pat off excess water with a tissue and you're nearly there!

You can see that the edges (where we left our border) are still visible around the crosses at this stage, where the flash on the camera has caught them, so one final step. We used a spray matt varnish (again plundering our Warhammer stocks) to seal the decals and put an even shine across the plastic.
On the final picture, you can't really see the decal edges at all
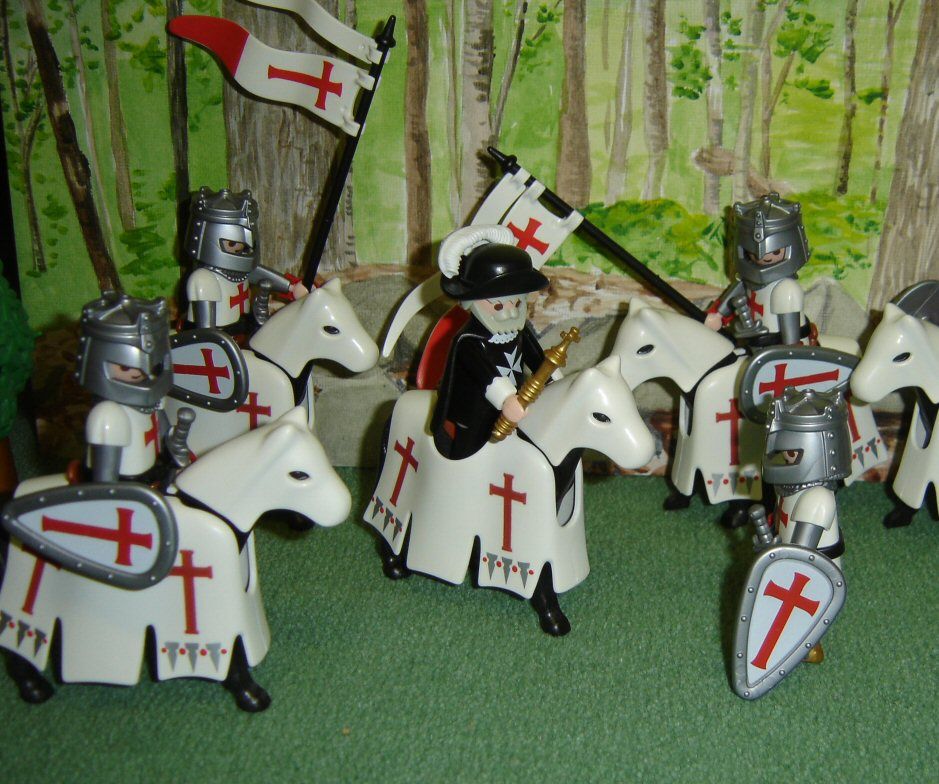
It was a fun first project, and has probably started the ball rolling for all sorts of customisations now!
I think the decals showed up so well because they were on a white background (lucky that!) - not sure how well they'll go on different colours. When I get brave enough to try, I'll post up results